to me, the time of year doesn't matter - i always love seeing and wearing flowers! i think one of the easiest ways to incorporate something fun into your look without it being too big or bold (and that could be the wallflower, no pun intended, in me speaking) is to do it in the form of a hair accessory. i've been wanting a pretty, romantic flower headband that wasn't too costume-y, but since i couldn't find quite what i wanted, i figured i'd just try making it myself! a little warning (which isn't a bad thing if you're a picker like me) - your fingers will be covered in glue!

i really had my heart set on those pretty little paper roses that come in different colors in a little bundle of maybe ten or so, but unfortunately, it seems they're not as easy to find as they used to be (when i was younger, i spent most of the money i had on either candy or craft supplies, and although i never remember actually using those paper roses for anything, for some reason i sure did buy a lot of them). so i settled for these little calla lilies with paper leaves, which i still think work just fine.
 for this project you will need:
 a headband (i chose one that would blend well with the color of my hair so as not to take any attention away from the flowers), some flowers with stems, some sort of glue, and some wire clippers.
 STEP 1:
 first start by clipping the flowers and leaves from the bundle. i decided to leave about one inch/25cm of stem attached so that i could wrap it around the headband.
 STEP 2:
 put a line of glue (enough for several flowers and leaves) on a section of the headband. wrap the stems around the headband, over the glue, and press the flowers down against the headband so they're on a spot of glue.
 STEP 3:
 continue adding lines of glue and wrapping the flowers and stems around the headband. once you feel you've added enough flowers, wrap the stem of the last flower back toward the others, that way you've got a nice neat end with no stems poking out. then start picking the glue from your fingers.

and there you go, now you've got yourself a dainty little headband! i did learn one thing while i was making this, though, and that is: be sure your camera is on the correct white balance setting
before taking the pictures, that way the colors aren't all over the place!
also, this has absolutely nothing to do with the headband, but i feel the need to share nonetheless. have you ever watched the show COPS? well, if not, you're missing out on some first rate rednecks, prostitutes, and hybrids of the two. anyway, my brother, derek, and i used to watch COPS some afternoons for a good laugh, and there was one particular episode where this older man was explaining to the officer why he threw a rock at someone's car. just a brief description of the older man: he was wearing a button-up shirt that was only buttoned up to about his sternum, his necklaces were showing, his hair was slicked back elvis-style, and he pulled a black plastic comb from his back pocket to fix his hair while he was on camera. he said to the cop, "i threw a rock beh-cawz (because) he gave me the fangur (finger)." now, i can never say or think finger without doing it the redneck way (fangur), and above where i said about picking glue from your fingers, i was really thinking, "...picking the glue from your fangurs."


 i've got a few more ideas in the works for gold dipping, and i'm also going to make some of the hoops in sterling silver since i know not everyone is as big a fan of gold. and while i'm listing these gold dipped howlite and quartz pieces to my shop (later this evening), i've got some more waiting on me; i thought the way they were hung, with a little tweaking, could make a neat mobile...
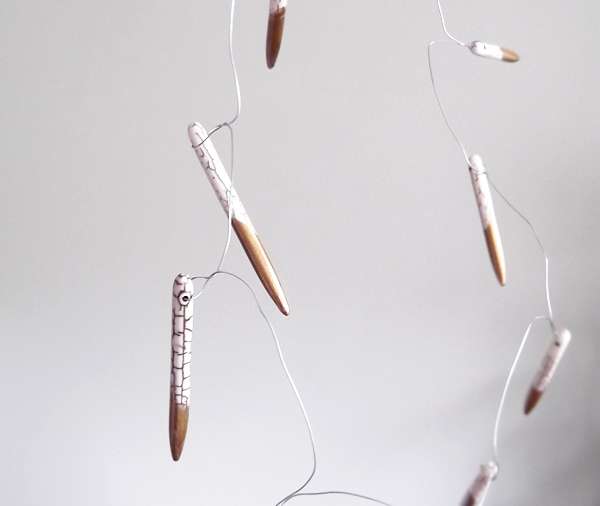 so that's what i've got for now. what have you been working on lately? if you have a shop, have you been busy making things for the holiday shopping rush?