Showing posts with label diy. Show all posts

My Simple Boot Strap DIY

Because I'm not courageous enough to have an asymmetrical haircut, get a sleeve of tattoos, or have unusual piercings, I have to get a little punk rock in in more subtle ways.  I figured studded boot straps were a good accessory to add just a teeny bit of rock & roll to my outfit.


These were so simple to make, and luckily I had all the supplies already.  I was originally going to stud the entire way around, but once I got three in, I kind of liked that look.  Who knows, I may end up adding more later.

Here's what I used to make them:
- black leather (or vinyl as a budget option, and JoAnn has some pretty believable faux leather)
- silver and gold tone double cap rivets/studs, size small (I got mine from Michael's)
- a leather punch (also from Michael's)
- a rivet setter & anvil (but you could just use a hammer and a hard surface)
- large brass rings

Here's how I made them:
- I measured how long I needed each section of leather to be, and added some length so it could be doubled under the the studded/riveted area
- Cut my leather strips with an exacto knife.
- Folded the leather around the brass ring.
- Punched my holes in the leather where I want the studs to go.  It's probably best to measure, but I just tend to eyeball everything.
- Hammered in my rivets/studs.
- Moved onto the next side and repeated all the steps to get the leather around the second ring.
- Did the same thing all over again for the second strap!

It's super simple, and these slide off, that way I can wear them on other boots!

My Maximum Destruction DIY

After seeing the billionth hanging plant holder on an interior design blog, I decided to take a little break from work yesterday to finally make myself one (because it's only been on my 'When I Get Time' to-do list for ages).  And because I had a freshly charged battery, I figured I'd take pictures and share.  You've probably seen one of the dozens of hanging holder DIYs on Pinterest, so obviously this idea isn't new!


1. Decide what you want to put in your hanger, and how big it will be.  It doesn't have to be a plant; it could be a dish to collect keys, mail, soaps in your bathroom, etc.  Then get your supplies together!  You will need: some type of strong string (I used leather because I had a lot on hand), some type of ring (I had this old brass circle brooch, and I cut off the pin back and filed it smooth), scissors, and you can use any decorative beads or tubes if you choose (I was going to then decided to keep it simple).  *If you decide to add beads or tubes, you will need to add those before you add your knots!


2. Cut eight lengths of string, or leather, or whatever you're using.  The length you cut depends on how long you want your hanger to be.  I cut mine about 5 feet long, and my hanger is about 2 feet long when finished.


3. Get all four pieces of your string together, and pull it through your ring so that your ring is in the middle of your strings.  You should now have eight ends hanging below your ring.  Tie a basic knot in your strings below your ring.


4. Decide how far down you want your knots to start, then start knotting!  Just make a simple knot with two of your strings, move on to two more, and continue until you have four knots.

5. Move down and continue knotting your strings.  This time, use one string from a previous knot, and one from another knot. You don't want to tie a knot with same two strings from the knot above.


6. Finish the bottom off by tying a simple knot.  Make sure it's nice and tight so it won't come loose from the weight of your planter!

7. Hang that b*tch up!  I found this hook somewhere among some other things, and I have no idea why I had it, but I set it aside thinking maybe I could use it one day.  And now I have.  Also, it's going to be a little more difficult to get your plant situated in the hanger if you have long vines hanging down.  This part was a little tricky since I was aiming for minimum plant mutilation.


That was the finished project until I had to pull a Danielle, and try to readjust the knot at the bottom without taking the planter out first.  I paid less than a dollar for this vintage planter, so it's not like I'm out a light bill or anything, but I really loved it, so I was pretty pissed with myself.  From DIY success to maximum destruction in no time.

What started out as a free DIY since I had all the supplies at home has turned into one that will cost me a few bucks as I now have to buy another planter (I went through a purge last year and got rid of all my indoor planters thinking I'd never use them again).  Oh well, we live and learn (or in my case, we live and break things and don't learn how not to break, but instead learn that breaking sucks).


So there you have it - you can ruin your DIY just as fast as you can create it.  I really should've seen it coming though, considering I'm kind of known in my house for being the one to accidentally break lots of perfectly good stuff.

a pretty storage DIY

if you're like me, you leave things laying around on about every surface rather than finding them a home and keeping them there.  it's terrible, but i've always been like this.  luckily, there are lots of pretty options in the way of bowls, trays, baskets, etc. to catch all of the things that never get put away!  one of my favorites to make is fabric bowls or baskets because they're easy, cheap, and pretty!


what you'll need for this project: clothesline or cotton cord (i use nylon clothesline because it comes in about 100' packages for just a few dollars), fabric, thread, scissors, sewing machine (or you can do it by hand but it will take a  lot longer).


first, cut your fabric into strips about an inch wide or a little more.  the number of strips you'll need for your bowl or basket depends on the size you want and on the length of your strips, so start of with fewer than you know you'll need, that way you don't waste fabric!


to start your bowl or basket, fold one end of your fabric over the end of your clothesline.  keep that pinched and start wrapping your strip around the clothesline at an angle.


once you've gotten a few inches of your fabric wrapped around the clothesline, pin it in place because you're almost ready to sew!  fold your fabric-wrapped clothesline so that you make a coil.  start sewing at the end, in a circular pattern, so that your line of stitched radiates out from the end.  use a zigzag stitch and be sure you're getting both sides of the clothesline.  continue wrapping your fabric and sewing.  once you get to the end of a piece of fabric, just wrap a new piece over that end and keep on sewing!


once you've gotten the base as large as you want, it's time to make the sides.  to make sides, simply fold your bottom up (with the foot still down and the needle still through your clothesline).  to get walls that are straight up, fold your base so that it is perpendicular to the table.  if you want tapered sides like i did, fold your base up at about a 45 degree angle.  then keep sewing round and round just like before!  (sorry, i got a little ahead of myself before i thought to take the picture).


continue sewing until you've gotten the walls of your bowl or basket as high as you want them.  now it's time to decide if this will be a bowl or a basket.  for a bowl, you don't need to do anything.  for a basket, it's time to make little handles.  all you do is pull up a part of your fabric-wrapped clothesline and don't sew that to the body.  backstitch what you've sewn, then move onto the other side of the handle and start sewing again.  repeat that step for a handle on the opposite side.


take a break if you need.  when i make large bowl or baskets like this one, there's no way i can do it all in one sitting.  so i get a glass of tea and flojo and i enjoy craft talk over a few whole wheat noodles.


now you're ready to finish off your bowl or basket!  just cut your clothesline a little shorter than your fabric and wrap so that the end of your clothesline is hidden in the fabric.  then just keep sewing like you have been until the end is sewn down.


and now you have a pretty and handmade place to keep little bits and pieces, and no one has to know that this isn't where they really belong!  if you decide to try this out, i'd love to see your final product, or hear what you thought!


my diy

when it comes to diy - and the internet seems to have an unlimited supply - i swear i have good intentions, but like my stack of to-be-altered thrift store finds, i often don't ever get around to doing them.  but sometimes i see one so awesome i know it would make angels cry to ignore it, and no one want to be responsible for angel tears.


a couple weeks ago i saw a tie dye denim diy on honestly... wtf and knew that if i could find a chambray shirt, IT. WAS. ON.  i kid you not, i've been searching thrift stores for nearly a year for a chambray shirt that fit and didn't have old lady embroidery with absolutely no luck.  so imagine my surprise when the day after i saw the diy i managed to find a chambray shirt that fit for only $3.50!  i couldn't believe it.  i was pretty nervous to bleach it seeing as how i really liked it just as it was and i'd been looking forever, but i knew i didn't want to forget about this diy.

as long as you have rubber bands, a shirt, and some bleach, the diy is basically just common sense.  but i always seem to forget just how fast bleach can, well, bleach, once it starts to work.  the diy says to keep your shirt in bleach for 15-20 minutes, but from my experience bleaching fabric for bags, i knew that anything close to 10 would mean it would go from blue to white to tan with bleach-eaten holes.  my shirt stayed submerged for about 3 minutes, and i already had water waiting in the washing machine to stop the bleach, but i didn't take into account how long it would take me to remove the 8 million rubber bands, so it ended up a little lighter than i'd hoped, but i still love it!  i can see it now with a lace skirt and wedges...  i'm hoping maybe, fingers crossed, i'll be able to find another chambray shirt to bleach, only this time i'll remember how long the rubber bands take to come off!


the pictures where i'm wearing it make it look a lot lighter than it actually is, but i promise it's awesome, and i'm pretty sure after that bleach bath it's cleaner than any other clothes in my closet!  have you been working on any diy's lately?  if so, what are they?  whenever i see a good diy online, i'm always curious about other people's results!

also, be sure to enter the $75 gift card giveaway from shabby apple because it ends tomorrow!  and for dinosaur toes readers, shabby apple is kind enough to give you 10% off of your purchases with the discount code dinosaurtoes10off

DIY: let's ruin that dress!

do you have clothes in your closet that you just don't wear? or, like me, a stack of clothes so unworn they never make it out of that folded stack on the dryer? if you've been following me on twitter, you probably know i've really been trying to downsize and donate. i have - had, rather - a dress made from really pretty fabric, but i just couldn't wear it any longer. i never, i repeat, NEVER, have a problem with clothes being too tight in the chest, but this dress was, and i can't help but think it was to make IBTC members like me feel a little better about, uh, our smallness. so i decided to shred it up and recycle it!

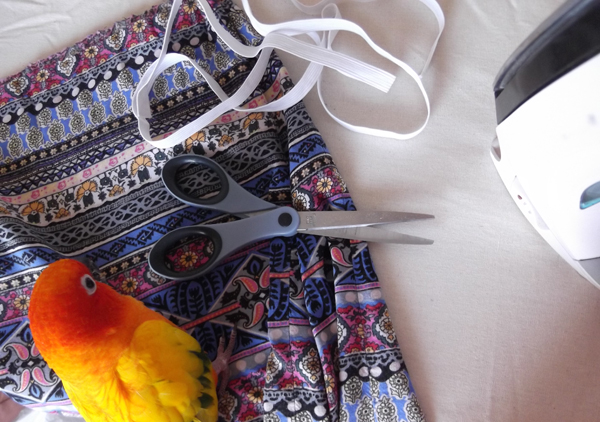
for this project you'll need a dress that you want to ruin (i liked that this one was lightweight, flowy fabric so i knew it would hang nicely without being stiff), scissors, an iron, elastic, a sewing machine, and a friend to keep you company, especially if you're a slow sewer like me.

i should have taken a picture before i cut off the top half, but of course i don't think about it until after it's gone. anyway, cut that sucker up! iron out any wrinkles or creases. around what will be the waist, fold over a section larger than the width of your elastic. then make one more crease, that way you're elastic is completely hidden in a little pocket with no raw edges.

ask a friend for their opinion if you're not sure about what you're doing. or, if things are going smoothly, why not sing together? i suggest something fun like this that one or both of you can dance to should you need a break.

i like to get a section of elastic in its little pocket and then pin it so that when i pull it as i sew, it doesn't get lost (because it's frustrating trying to fish it out later). sew, sew, sew, and pull the elastic as you go. when you've sewn just about all the way around, STOP! leave about an inch open so that you can sew the two ends of elastic together, then go ahead and sew the elastic pocket closed.

you're finished! and might i suggest - assuming your skirt is printed - that you pair it with another non-matching print? i think it's more fun that way. now when people compliment you on your skirt, or ask you where you got it, you can give a shy smile and say, "this old thing? oh, i made it."

do you recycle or remake any of your clothes? if so, what have you made?

a GLITTER diy!

i don't know about you, but i love some sparkle - especially in the form of glitter (and a sequin skirt, but i still don't have one of those). i've been on a bit of a mission to find clear nail polish with BIG pieces of gold glitter, but i've come up empty-handed. i'm sure it's sold somewhere around here, but with all the busyness that comes with this time of year, i've not been able to look everywhere in this city that sells nail polish, so i figured i'd just save some time and make my own.

what you'll need: clear nail polish (be sure you get some that's thick as i learned on my first attempt that the glitter will NOT stay even remotely suspended in the thin, watery polish), glitter. i found this tube of big gold glitter at michael's for $0.99.

i forgot to take a picture of this, but to get the glitter in the bottle of nail polish without a beautiful gold mess, i folded a small piece of paper in half, poured some glitter into it, and then dumped the glitter into the bottle from the fold of the paper. mix it up, shake it around, dance for a minute, then go paint your nails!

i'm going to go ahead and tell you that, like my underwear, i do not spend a lot of money on cosmetics. i'm cheap. i bought the N.Y.C. brand polish for less than $2, and although i haven't been wearing it long, i think it works fine for this project.

also, i have to tell you that painting my nails is sort of like a celebration of accomplishment for me! i've been so incredibly busy making jewelry to have orders filled, shipped, and delivered by christmas that i had a breakdown and cried like a baby because i felt so overwhelmed that i haven't been able to do anything that, yes, is unimportant, but fun to me. since i've finally finished the christmas orders so i know my hands will have a break for a little while, i decided there was no better time to paint my nails, because with a slow down in business, the polish would actually last more than a few hours!

a flowerchild DIY

to me, the time of year doesn't matter - i always love seeing and wearing flowers! i think one of the easiest ways to incorporate something fun into your look without it being too big or bold (and that could be the wallflower, no pun intended, in me speaking) is to do it in the form of a hair accessory. i've been wanting a pretty, romantic flower headband that wasn't too costume-y, but since i couldn't find quite what i wanted, i figured i'd just try making it myself! a little warning (which isn't a bad thing if you're a picker like me) - your fingers will be covered in glue!

i really had my heart set on those pretty little paper roses that come in different colors in a little bundle of maybe ten or so, but unfortunately, it seems they're not as easy to find as they used to be (when i was younger, i spent most of the money i had on either candy or craft supplies, and although i never remember actually using those paper roses for anything, for some reason i sure did buy a lot of them). so i settled for these little calla lilies with paper leaves, which i still think work just fine.

for this project you will need: a headband (i chose one that would blend well with the color of my hair so as not to take any attention away from the flowers), some flowers with stems, some sort of glue, and some wire clippers.

STEP 1: first start by clipping the flowers and leaves from the bundle. i decided to leave about one inch/25cm of stem attached so that i could wrap it around the headband.

STEP 2: put a line of glue (enough for several flowers and leaves) on a section of the headband. wrap the stems around the headband, over the glue, and press the flowers down against the headband so they're on a spot of glue.

STEP 3: continue adding lines of glue and wrapping the flowers and stems around the headband. once you feel you've added enough flowers, wrap the stem of the last flower back toward the others, that way you've got a nice neat end with no stems poking out. then start picking the glue from your fingers.

and there you go, now you've got yourself a dainty little headband! i did learn one thing while i was making this, though, and that is: be sure your camera is on the correct white balance setting before taking the pictures, that way the colors aren't all over the place!

also, this has absolutely nothing to do with the headband, but i feel the need to share nonetheless. have you ever watched the show COPS? well, if not, you're missing out on some first rate rednecks, prostitutes, and hybrids of the two. anyway, my brother, derek, and i used to watch COPS some afternoons for a good laugh, and there was one particular episode where this older man was explaining to the officer why he threw a rock at someone's car. just a brief description of the older man: he was wearing a button-up shirt that was only buttoned up to about his sternum, his necklaces were showing, his hair was slicked back elvis-style, and he pulled a black plastic comb from his back pocket to fix his hair while he was on camera. he said to the cop, "i threw a rock beh-cawz (because) he gave me the fangur (finger)." now, i can never say or think finger without doing it the redneck way (fangur), and above where i said about picking glue from your fingers, i was really thinking, "...picking the glue from your fangurs."

if my hair had a uniform: a tutorial

lately my hair has been driving me crazy; it hangs in my face, it gets in my food and saves some for later, it gets closed in my car door on windy days, it tickles my face when i try to sleep, and frankly, it's just gotten too long. i'm really lazy about styling my hair, and while i've tried doing a few things with it, i've found the styles don't work with quite so much hair, or that they don't hold for more than about an hour. since i had some extra time on friday morning, i decided i'd try playing a little, and i was so happy with the outcome i thought i'd share in the form of a tutorial.

STEP 1: for me, this works best on damp hair, otherwise i have more fly-aways and the braid is just too loose. on the top of your head, pull up a section of hair on one side and divide it into three sections.

STEP 2: start a french braid with the three pieces of hair you're holding, going toward the lower middle part of the opposite side of your head (or as good a french braid as you're able; i'm no master at it, but this is supposed to be a fun, even somewhat messy hair style!).

STEP 3: continue the braid to the very end of your hair and finish it off with a hair elastic. i used black just in case a little peeked out once my hair was finished, but most likely, this will be hidden.

STEP 4: from the part where your braid comes off of your head, fold it over and pull it to the opposite side of your head.

STEP 5: once you've doubled your braid back over to the side where you originally started your braid, fold it once more to the opposite side (the direction in which you were originally braiding). tuck the end of your braid where your elastic is under the chunk of braid that is folded.

STEP 6: using hairpins that blend with the color of your hair, pin the end of your brain (hahaha, chris just noticed i said brain instead of braid!) under the first section of braid you folded. to ensure it stays put, i used larger pins, and i got a section of the french braid, and the lower braid in the pin. then pin the second section of braid you folded. again, i got both the top braid and the bottom braid in my hair pin so that i knew it would stay in place. in the picture i'm pointing to where my hairpins are, one of which you can see a little bit.

and that's it, you did it! i don't really like to wear my hair the same way every day, but i'm going to have a hard time not doing this all the time 1. because it will keep my hair out of my face, 2. because it looks good, and 3. because it's easy (and by easy i mean no curling, straightening or drying) and it only takes about five minutes to do!

do you have any certain tips or tricks for hair? or a hair tutorial for a fun style? i hope you had a good weekend, friends!